You’ve cooked, you’ve cleaned… now it’s time to tackle that washing machine!
Washing clothes is something that we all have to do at some point in our lives. If not, you’re just the laziest OR most fortunate person in the world. When it comes down to it, washing is not that difficult. But if you’re not sure, here are some handy tips to remember when trying to get that miscellaneous stain out of your top…
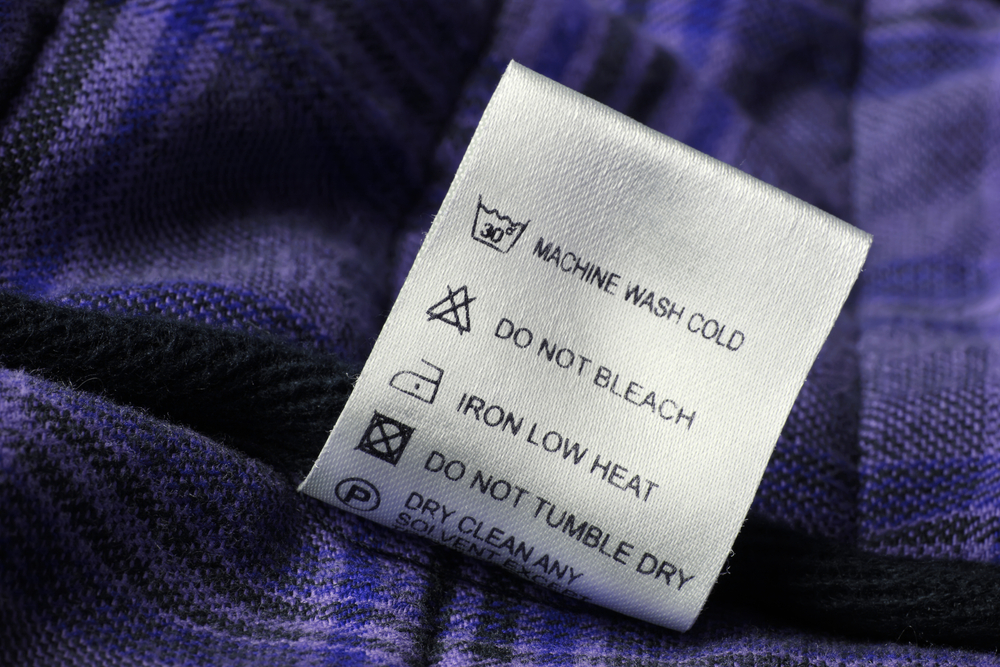
Most clothes have an annoying little tag on the back that is obviously designed to annoy you. …Except that it actually acts as a guide to the world of washing. Yes, that silly tag holds everything you need to know about how to wash that particular item, so it’s much more valuable than you might think. You’ll probably come to realise this once the writing has washed off and you’re left scratching your head…
But, before you get started with cleaning lotions and potions, there’s one thing you need to understand…
How to sort your clothes:
Sorting clothes is way more important than you may think, it’s not just about separating your whites, darks and delicates anymore. If you want your clothes to be as clean as possible then sorting them properly will help you out. The five (yes, five!) recommended piles are: whites, light colours (including striped whites), darks, brights and delicates. Separating correctly will help you produce beautifully washed clothes every time.
Onto the washing part..

1. New to this whole process? Then washing tablets will be the key to your success. There are no spilling or measuring powders involved. Bio or non-bio both work well, but non-bio is usually recommended for any one with sensitive skin. If you do use liquid or gel, measure the correct amount according to the instructions on the bottle. Too much could clog up your clothes, making them dirtier than when they went in.
2. Washing tablets and fabric conditioner DO NOT go straight in the drum, put them in the drawer. Whatever you do please remember this otherwise you’re going to have a lot more than a pile of dirty clothes to deal with. If you decide to use washing gel, or gel pouches, these do go in the drum. So gel in, liquid or powder out. If in doubt, check the bottle.
3. Having lovely soft clothes is a must, so fabric conditioner is definitely your friend. However, it’s certainly not a case of the more the merrier (or softer). Don’t use too much because there’s a chance it’ll clog up the machine and nobody wants that!
4. Use the drawer correctly. In most washing machines, the drawers have three numbered sections. Number 1 (usually the thinnest) is for pre-wash, number 2 (thickest) is for your washing powder or tablet, whilst number 3 – which usually has a kind of cover on it, is for the fabric conditioner. It’s important to put these in the right places because that is the order that the machine will use them in!
5. DON’T overload the machine. Not only could you break it, but your clothes could also remain dirty! If there’s no room in the drum, they will move around in one big mess, rather than floating around separately. The general rule is if you lightly pat the clothes down, you should be able to reach in and feel a good gap between the top item and the drum, so aim for about 3/4’s full.
6. Now this is the important part, choosing the right temperature. As long as you’ve separated them correctly, most clothes can be washed at 40°. If they are brand new, then use a lower heat like 30°. This will prevent the dye from running and ruining your clothes. Washing at 30° will also lower your energy bills, as the machine doesn’t need to get so hot. However, wash towels and bedding at 60° as these hold more germs than clothes, which a lower temperature may not kill.
7. We strongly advice you not to dry clothes in your room. This is because it can cause mould and damp to accumulate and you could be charged for any damage caused. We suggest taking clothes to a laundrette and getting them properly dried in a machine if possible.
Time to dry off:

1. The fewer items you put in the dryer the more chance they’ll have to dry…DUH! (You’d be surprised at the amount of people who ask about that!) This is because they have more space to roll around, fluff out and dry off.
2. Before you put clothes in the dryer, shake everything when you take it out of the washing machine. This will prevent wrinkles and reduce drying time – taadaa!
3. Funnily enough, applying heat to things for a prolonged period of time can cause them to shrink. So make sure you know how long to dry them for and which temperature to use. That little label we mentioned earlier will help you with this, but as a guide the higher temperatures are for the same things you’ve washed at higher temperatures – so towels, sheets etc. Delicates and ‘cool-wash’ clothes should be dried at a cooler temperature.
4. If you don’t have a tumble dryer and can’t hang your clothes outside, the next best thing is to buy a ‘clothes-horse’ or drying rack. Whether it hangs from the door, folds up into a table or hovers in mid air… as long as it allows you to space out wet clothes, you’ll be ok. Using one of these will obviously save you a lot of money compared to machine drying them. Tip: If you hang wet tops or jumpers on hangers, hung off the rack, they’ll often dry crease free!
And finally..
5. DON’T put damp clothes away in your drawer because they’re ‘almost dry.’ This is a sure-fire way to mouldy clothes and a stinky room.
See! It really is as easy as it sounds! Now that you know how to wash with confidence, you can have a floor-drobe full of beautifully clean and dry clothes to navigate around. What? Life’s too short to iron!